Tutorial: Send an email
This tutorial shows you how to set up a minimum required SBS configuration and then send a simple text email via the Email Service. It is assumed you are new to the SBS Console and need to perform the initial setup from scratch.
First, you will create an account, a tenant, and an app, where:
- Account is the billing point for usage of the SBS API (your company);
- App is the email-sending software application developed by your company;
- Tenant is a client company that has licensed your app and on behalf of whom email is sent.
Next, you will generate a service access key required to access the Email Service that is in charge of sending email. Finally, you will use that key in the HTTP header of the API request and then run a GraphQL mutation that will send the actual email.
In the event that you already have a service access key, you can skip directly to step 6.
Step 1: Sign in to the SBS Console
To sign in to the SBS Console, you need either a Google or a Microsoft account. You can sign in to the console at https://console.socrate.io.
Step 2: Create an account
After signing in to the console for the first time, you must create an account before you proceed. The account is the billing point for usage of SBS services, and it groups together all SBS entities under the same umbrella.
To create an account:
-
Click the dropdown list in the rop-right corner, and then click New Account.
-
Enter an account name (for example, “DevelopmentAccount”), and then click Add.

Step 3. Create a tenant
In the SBS Console, most actions (including the creation of a tenant) can be performed both from a graphical user interface (Web UI) and from GraphQL. You can choose either approach, depending on your preferences. You can switch between the two interfaces by clicking the respective buttons at the top of the console:

To create a tenant from the Web UI:
- Click Tenants in the left-hand side navigation menu.
- Click New tenant.
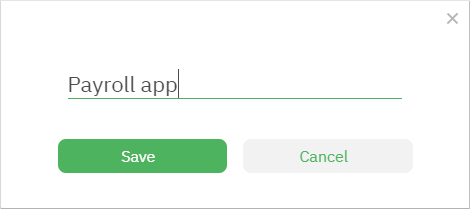
- Enter the tenant name, and then click Save. For the scope of this example, let’s give this tenant the name “Super Pizza”. You may replace the example value with another tenant name.

GraphQL
To create a tenant from GraphQL:
- Click the GraphQL
 button at the top of the console.
 - Run the following mutation:
mutation createTenant($input:CreateTenantInput!) {
  createTenant(input: $input) {
    name
    id
  }
}
In the variables, we will give this tenant the name “Super Pizza”. You may replace the example value with another tenant name.
{
  "input": {
    "name": "Super Pizza"
  }
}
Once you run the mutation, the result will contain the name and ID of the created tenant. Take notice of this ID; you will need it in a subsequent step.
Step 4: Create an app
To create an app:
- Click Applications in the left-hand side navigation menu.
- Click New application.
- Enter the application name, and then click Save. For the scope of this example, let’s give this app the name “Payroll App”. You may replace the example value with another app name.
GraphQL
To create an app from GraphQL, run:
mutation createApp($input:CreateAppInput!){
  createApp(input:$input){
    name
    id
  }
}
In the variables, let’s give this app the name “Payroll app”. You may replace the example value with another app name:
{
  "input": {
    "name": "Payroll app"
  }
}
Once you run the mutation, the result will contain the name and ID of the created app. Take notice of this ID; you will need it in a subsequent step.
Step 5: Generate a service access key
Now that you have a tenant and an app, you can generate a service access key. The service access key will enable the tenant “Super Pizza” to call the Email Service and send email from the “Payroll app”.
When creating a key, you must provide a scope. The scope defines the extent of permissions available to the key bearer. To keep things simple, we will leave the key’s scope empty for the scope of this tutorial, which means that access to all queries and mutations of all services (including the Email Service) is granted to the bearer.
To generate a service access key:
- In the left-hand side navigation menu, click Tenants.
- Click the tenant for which you would like to generate the key.
- Click the Add
 button in the top-right corner of the service access keys table. A dialog box appears.
 - Under Applications, select the application for which you are generating the key.
- Optionally, enter a description for the key you are generating.
- For the scope of this tutorial, leave the Scope field empty. An empty scope means that access to all queries and mutations of all services is granted from the app selected previously. For details, see Scope editor.
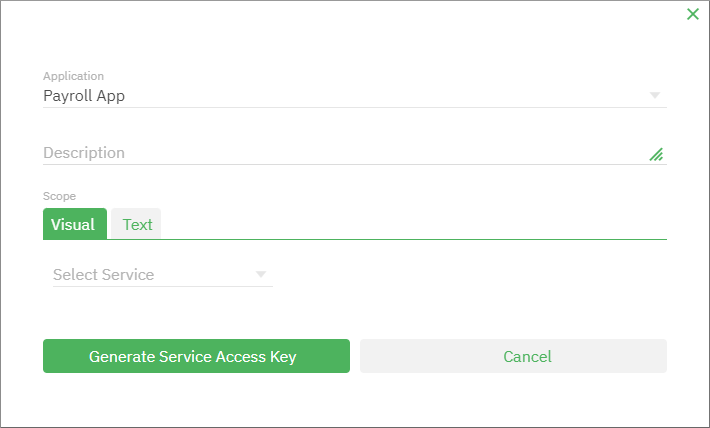
- Click Generate Service Access Key. The key is generated and the dialog box remains open.
- Click View Secret Key and copy the private key value. You will need this key in the next step.
GraphQL
To generate a service access key from the GraphQL console, you must have:
- The app ID generated previously.
- The tenant ID generated previously.
- A scope. For the scope of this tutorial, we will leave the scope empty. This grants to the key bearer (that is, to the tenant “Super Pizza”) permission to call any SBS service from the application “Payroll app”. For information about restricting scope to particular services only, see Restrict access to services.
- Optionally, a description.
The GraphQL mutation that generates the actual key is as follows:
mutation generateServiceAccessKey($input:GenerateServiceAccessKeyInput!) {
  generateServiceAccessKey(input:$input){
    privateKey
    scope
    createdAt
  }
}
In the variables, make sure to replace the appId and tenantId with previously generated ones.
{
  "input": {
    "appId": "YOUR_APP_ID",
    "tenantId": "YOUR_TENANT_ID",
    "scope": "",
    "description": ""
  }
}
After you run the mutation, the privateKey field of the returned result stores the generated key. Take notice of it, because you will need this key in the next step.
Step 6: Send a test email
Now that you have a service access key, you can proceed to the GraphQL interface of the Email Service.
-
Open https://email-api.socrate.io/graphql in your browser.
-
In the HTTP Headers section at the bottom of the console, enter a value for the
x-api-keyheader, as shown below. This value must be the secret key you have generated previously.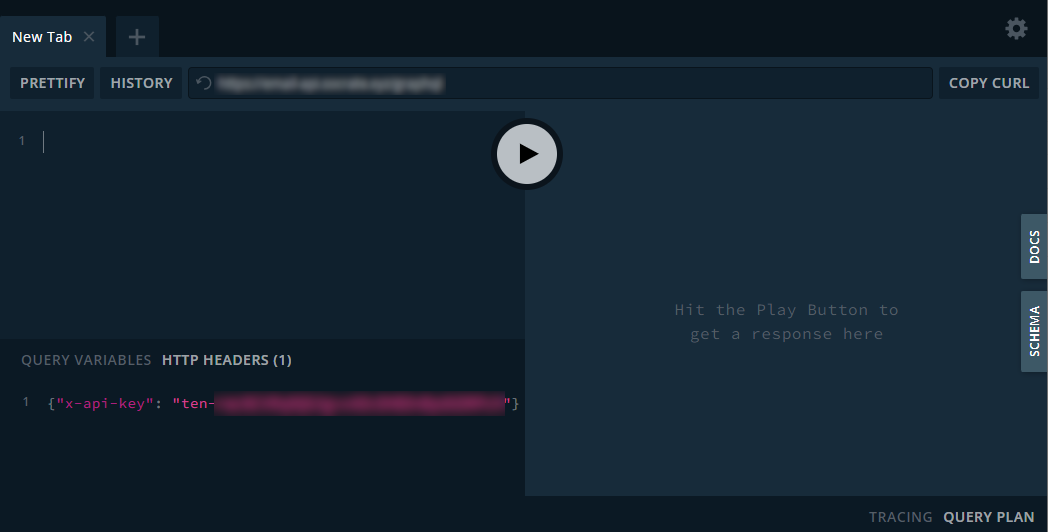
-
In the GraphQL pane on the left side, run:
mutation sendEmail ($input:SendMessageInput!) {
  sendMessage(
    input: $input
  ) {
    id
  }
}
In the variables, make sure to replace the name and email with your own:
{
  "input": {
      "to": { "name": "Your name", "address": "your.email@example.org" },
      "subject": "Test email",
      "textBody": "Hello from SBS"
  }
}
- Click the Play button.
At this stage, if the email was sent successfully, you are presented with a result similar to the one below:
{
  "data": {
    "sendMessage": {
      "id": "67fe4840-c255-11ed-9f8e-4d21d12d986a"
    }
  }
}
If an error occurred, the result displays an errors object that provides further details about the encountered problem.