Portal Users
SBS Portal users are people in your organization that need to interact with Socrate Business Services at tenant or application level. This includes, for example, the support personnel, who may need to view, monitor, or occasionally modify SBS data for a particular application and tenant.
The interface where tasks such as the ones above are performed is provided by the SBS Portal website (https://portal.socrate.io). For an introduction to the portal, see SBS Portal.
From the SBS Console, you can invite SBS Portal users to your organization’s SBS account, configure their permissions, or remove existing portal user from the SBS account. The permissions you define for each portal user dictate what services that user will be able to interact with after they sign in to the portal.
Invite portal users
You can invite other users (for example, people in your organization) to interact with SBS APIs from the SBS Portal. This works as follows:
- First, you define the permissions of the new portal user (including the application and tenant where access is granted) and send an invitation email.
- The invited user accepts the invitation from their inbox by clicking a link.
- The link redirects the user to the SBS Portal, where the user can sign in (or sign up if they haven’t used the SBS Portal before).
- After signing in or signing up, the invited user is able to view and work with the SBS APIs where they have been invited.
To invite a user to the current SBS Account:
-
If you haven’t done that already, sign in to the SBS Console.
-
If necessary, switch to the account where you would like to add the user. Remember that the current SBS account name is displayed at all times in the top application bar.
-
Click Portal Users in the navigation menu on the left-hand side.
-
Click Invite Portal User.
-
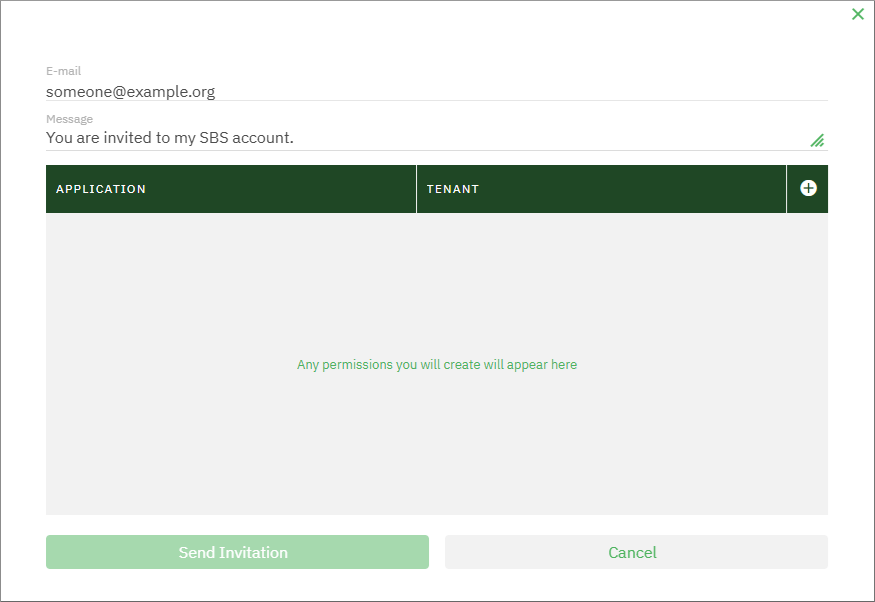
Enter the user’s email address.
-
Optionally, enter a text for the invitation message.
-
Click the Add
 button. A dialog box appears.
 -
In the Roles field, select a role that the user should be part of within the boundaries of the current application and tenant. This step is optional; however, if you don’t set a role you must set at least a scope (see the next bullet). Any roles that you have created from the Roles page are available for selection.
-
In the Scope field, define the user’s access rights (scope) with respect to the current application and tenant. You may omit this step if you already selected a role. Otherwise, keep in mind that you must set at least one role or at least a scope.
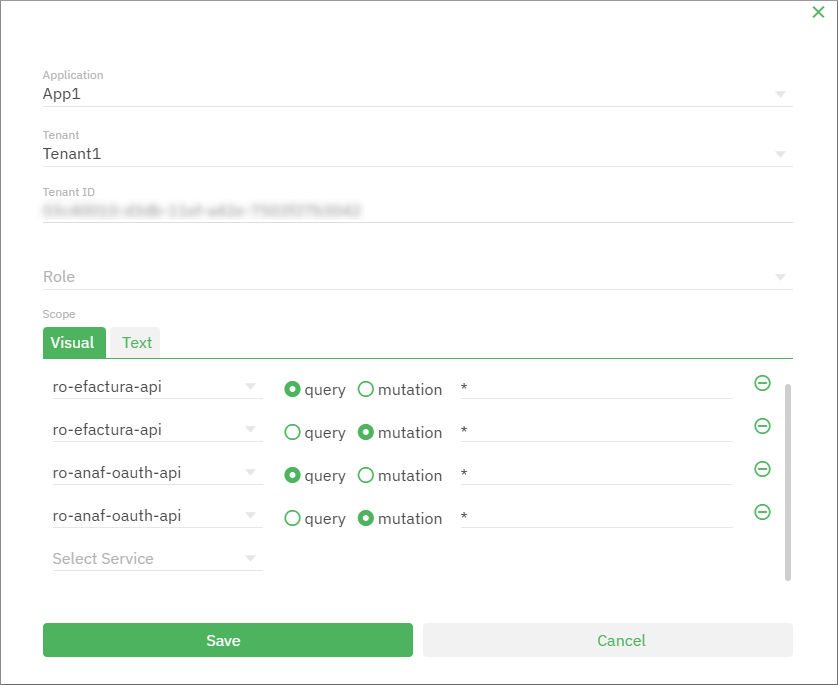
In this example, we are creating only one permission set, for the application App1 and tenant Tenant1. The permissions are set locally, using scope (not using a role) and are as follows:
- Read and write rights to the Romanian e-Factura Service
- Read and write rights to the Romanian ANAF Authorizations Service.
-
Click Save to save the current permission set. Optionally, to add other permission sets (for other applications and tenants), click the Add
button and repeat steps 8-9. -
Click Send invitation.
To invite portal users programmatically, run the invitePortalUser mutation of the Account API.
Update portal user permissions
You can add or update the permissions (scope) of an existing portal user as follows:
-
If you haven’t done that already, sign in to the SBS Console.
-
If necessary, switch to the account where you would like to add the user. Remember that the current SBS account name is displayed at all times in the top application bar.
-
Click Portal Users in the navigation menu on the left-hand side.
-
Click the portal user whose permissions you would like to set.
-
Do one of the following:
- To add a new permission, click in the top-right corner of the Permissions grid. A dialog box opens.
- To update an existing permission, click Edit
 next to the relevant permission record on the grid.
- To add a new permission, click
-
In the Roles field, select a role that the user should be part of within the boundaries of the current application and tenant. This step is optional; however, if you don’t set a role you must set at least a scope (see the next bullet). Any roles that you have created from the Roles page are available for selection.
-
In the Scope field, define the user’s access rights (scope) with respect to the current application and tenant. You may omit this step if you already selected a role. Otherwise, keep in mind that you must set at least one role or at least a scope. For details, see Scope editor.
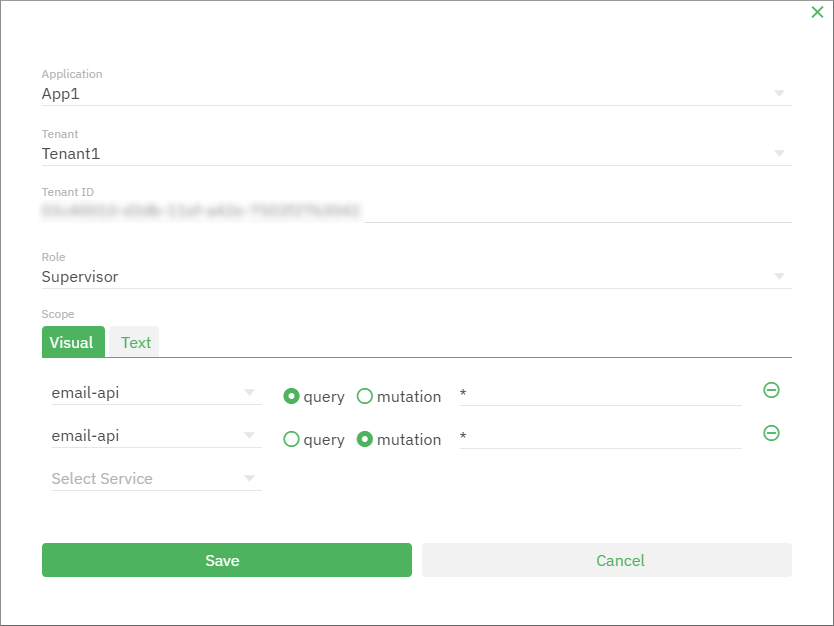
In the example above, the portal user is assigned the following permissions:
- the “Supervisor” role
- read and write rights to the email-api
If there are permissions already set for this application and tenant combination, a warning message appears on the dialog box, for example:
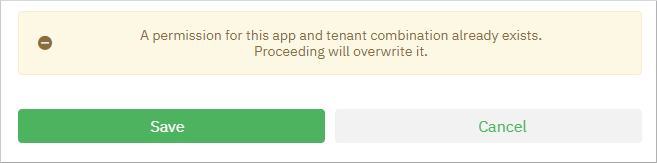
In this case, you can do one of the following:
- Close the dialog box without taking any action. This will leave the existing portal users permissions intact.
- To overwrite the existing permissions with the ones defined on the dialog box, click Save.
To set portal user permissions programmatically, run the setPortalUserPermission mutation of the Account API.
Wildcard tenant permissions
A permission covers one application and one tenant, so a portal user who works with the same application across your whole account needs one permission for every tenant — and another one each time you create a tenant. You can grant a single permission for all tenants instead. To do that, choose the asterisk (*) as the tenant, and the permission follows the application to every tenant of the account, including the tenants you create later.
Grant access this way to anyone whose work is not tied to particular customers. If a portal user should reach only a few named tenants, keep granting one permission per tenant.
Grant a permission for all tenants
To grant a permission for all tenants:
-
Open the permission dialog box:
- For an existing portal user, click the user, then click Add in the top-right corner of the Permissions grid.
- For a new portal user, click Add while inviting the user.
- For an existing portal user, click the user, then click Add
-
In the Select Application list, choose the application to grant access to. A permission for all tenants still covers a single application, so you must choose one.
-
In the Select Tenant list, choose
*. It is the first entry, above your tenants.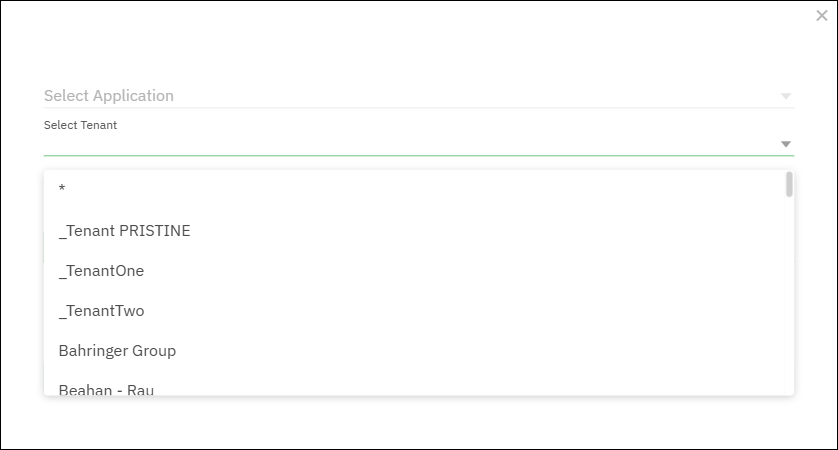
The Tenant and Tenant ID fields both read
*. -
Set a role, a scope, or both, exactly as you would for a single tenant. See steps 6-7 of Update portal user permissions.
-
If a message appears above the buttons, decide what to do about it before you continue:
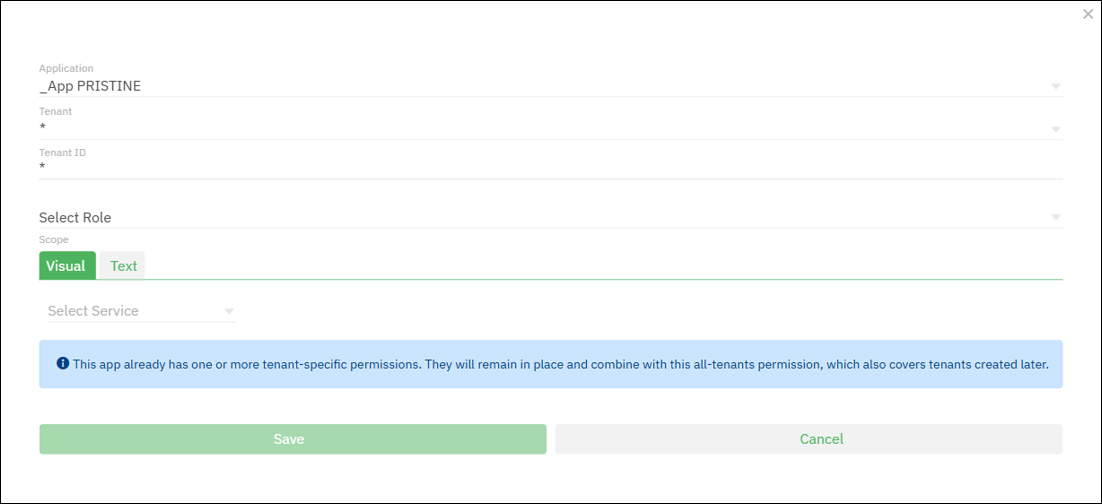
Message What to do This app already has one or more tenant-specific permissions… Nothing. Save, and the portal user keeps those permissions and gains the one for all tenants. A permission for this app and tenant combination already exists… The portal user already has a permission for all tenants of this application. Save to replace its role and scope, or close the dialog box to leave it as it is. -
Click Save.
The new permission appears in the Permissions grid with * in its Tenant column. Every tenant of your account now appears under that application in the list the portal user chooses from after signing in to the portal, carrying the role and scope you set. A tenant you create later joins that list the next time the user signs in.
Revoke a permission for all tenants
To revoke a permission for all tenants:
- Click the portal user.
- In the Permissions grid, click Remove
 next to the permission whose Tenant column reads
 *.
The user’s permissions for specific tenants of the same application stay as they are.
Check who reaches a tenant account-wide
To see which portal users can reach a particular tenant:
- Click Tenants in the navigation menu on the left-hand side.
- Click the tenant.
- Click the Portal Users tab. The grid lists every portal user who can reach this tenant, including those who reach it through a permission for all tenants.
- Click a portal user to see the permissions that apply to this tenant. A permission granted for all tenants reads
*in its Tenant column.
Grant and revoke programmatically
To grant a permission for all tenants from the Account API, pass * as the tenantId of the permission you send to setPortalUserPermission, or of a permission you include in an invitePortalUser invitation. To revoke it, pass * as the tenantId of the permission key you send to removePortalUserPermission.
Remove portal user permissions
To remove existing permissions of a portal user for a particular application, or tenant, do the following:
- Click the portal user.
- In the Permissions grid, click Remove next to the permission that is to be removed.
To remove portal user permissions programmatically, run the removePortalUserPermission mutation of the Account API.
Remove portal users
You can delete portal users as follows:
- If you haven’t done that already, sign in to the SBS Console.
- If necessary, switch to the account where you would like to add the user. Remember that the current SBS account name is displayed at all times in the top application bar.
- Click Portal Users in the navigation menu on the left-hand side.
- Click Remove
 next to the portal user you would like to delete, and confirm your action when prompted.
To delete portal users programmatically, run the removePortalUser mutation of the Account API.