Configure an email-sending domain at application level
There are certain business cases where all tenants linked to a particular application need the ability to send email from the same email address. For example, let’s imagine that Tenant A and Tenant B are both linked (through their service access key) to an app called “Example.app” and both need to send auto-generated mail from an address like no.reply@example.org).
To make the scenario above possible, the email domain example.org must be configured at application level, which is the subject of this topic.
Configuration
To configure an email domain at application level, there are two steps:
- Verify the email domain at application level.
- Add one or multiple authorized email senders for that domain.
Step 1: Verify the email domain
To verify a domain identity at application level:
-
Click Applications in the left hand-side menu.
-
Click the application for which you would like to verify the email domain.
-
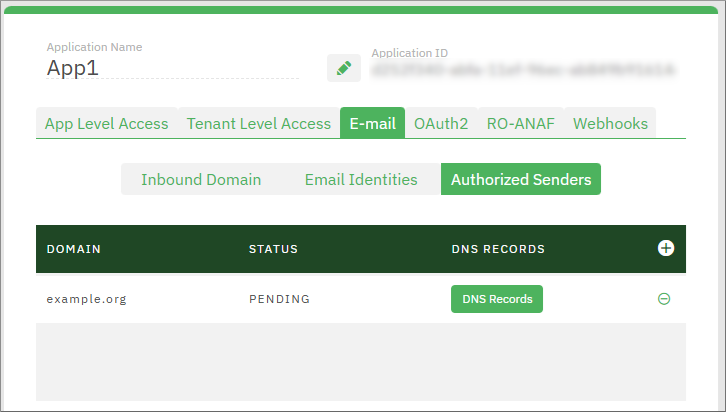
Click E-mail, and then click the Authorized Senders tab.
-
Click the
 button in the top-right corner of the upper grid.
 -
Enter the domain name to be verified (for example, example.org), and then click Add. The domain should now appear in the grid with the PENDING status.
-
Click the DNS Records button. A dialog box opens that contains a list of DNS entries.
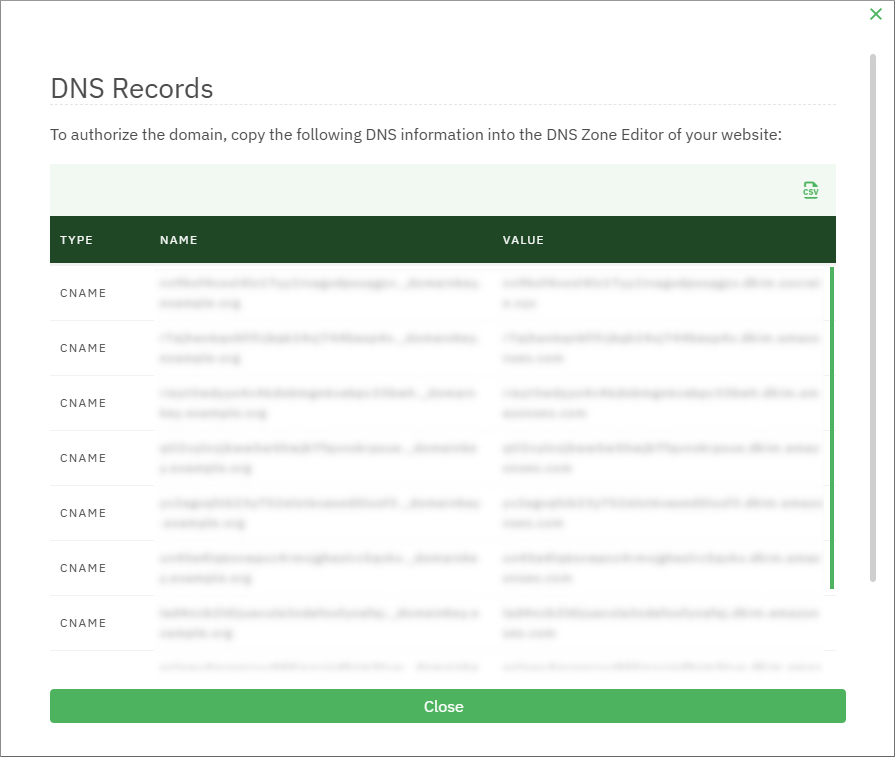 There are three DNS records for each of the three regions in the Amazon Web Services (AWS) global infrastructure, which makes nine DNS records in total. The tenth DNS record is for authorizing Socrate Business Services on this domain.
 -
Add to your domain’s DNS zone the ten new DNS records as given above. The instructions will vary depending on your domain provider.
GraphQL
To perform the same action programmatically from GraphQL:
- Run the
verifyDomainIdentitymutation of the Account API. The ID of your application and the name of the domain to be verified must be supplied as input arguments.
mutation verifyDomainIdentity($appId:ID!, $domain:Domain!) {
  verifyDomainIdentity(appId:$appId, domain:$domain) {
    domain
    status
    dnsRecords { type name value }
  }
}
{
    "appId": "YOUR_APP_ID",
    "domain": "example.org"
}
- In the response, you will get a list of ten DNS records.
- Add to your domain’s DNS zone the ten new DNS records as given above. The instructions will vary depending on your domain provider.
To view the domain identity and its verification status, run the app query and request the domainIdentities response field, for example:
query app($id:ID!,$domainIdentitiesFilter:DomainIdentitiesFilter){
  app(id:$id){
    id
    name
    domainIdentities(filter: $domainIdentitiesFilter) { domain status }
    emailSenders
  }
}
{
    "appId": "YOUR_APP_ID"
}
To delete a domain identity (either VERIFIED or PENDING), run the deleteDomainIdentity mutation of the Account API, for example:
mutation DeleteDomainIdentity($appId:ID!,$domain:Domain!) {
  deleteDomainIdentity(appId:$appId, domain:$domain) {
    domain
    status
    dnsRecords { type name value }
  }
}
{
    "appId": "YOUR_APP_ID",
    "domain": "example.org"
}
Step 2: Add email senders
Email senders are email addresses authorized to send email at application level for a designated domain. Notice that the domain of each email address must be the same as the domain verified previously. For example, if you verified a domain like example.org in Step 1, you should add one or more email senders for that domain, for example jane.doe@example.org, john.doe@example.org, and so on.
To add authorized email senders:
-
If you haven’t done that already, sign in to the SBS Console.
-
Click Applications in the left hand-side menu.
-
Click the application for which you would like to verify the email domain.
-
Click E-mail, and then click the Authorized senders tab.
-
Click Add
 in the top-right corner of the lower grid. A dialog box pops up.
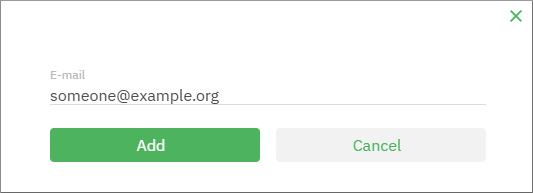
-
Enter the email address, and then click Add.
To delete an authorized email sender, click the Remove  button next to the record you want to remove.
GraphQL
You can also add authorized email senders programmatically through GraphQL. To do that, run the addEmailSender mutation of Account API, for example:
mutation AddEmailSender($appId:ID!,$address:EmailAddress!) {
  addEmailSender(appId:$appId,address:$address)
}
{
    "appId": "YOUR_APP_ID",
    "address": "jane.doe@example.org"
}
To view the email senders configured for a particular app, run the app query and request the emailSenders response field, for example:
query app($id:ID!,$domainIdentitiesFilter:DomainIdentitiesFilter){
  app(id:$id){
    id
    name
    domainIdentities(filter: $domainIdentitiesFilter) { domain status }
    emailSenders
  }
}
{
    "appId": "YOUR_APP_ID"
}
To delete an email sender, run the removeEmailSender mutation of the Account API, for example:
mutation RemoveEmailSender($appId:ID!,$address:EmailAddress!) {
 removeEmailSender(appId:$appId,address:$address)
}
{
    "appId": "{{appId}}",
    "address": "jane.doe@example.org"
}