Configure an OAuth 2.0 client in Azure
This topic describes how to register a new application in Microsoft Azure. This is a requirement if you intend to integrate your SBS-based app with Microsoft-provided services. It also describes the minimum configuration required to provide end users with the ability to connect their Microsoft 365 account to the app.
Registering the app
-
Sign in to the Microsoft Azure platform (https://azure.microsoft.com).
-
Navigate to App registrations.
-
Click New registration.

-
Enter a name for your app.
-
Under “Supported account types”, select the option applicable to your business scenario. For example, assuming that you would like to target the widest possible audience of users, select Accounts in any organizational directory (Any Azure AD directory - Multitenant) and personal Microsoft accounts (e.g. Skype, Xbox).
-
Enter the redirect URL to which your users should be redirected after they complete the OAuth 2.0 authorization process.
-
Click Register.
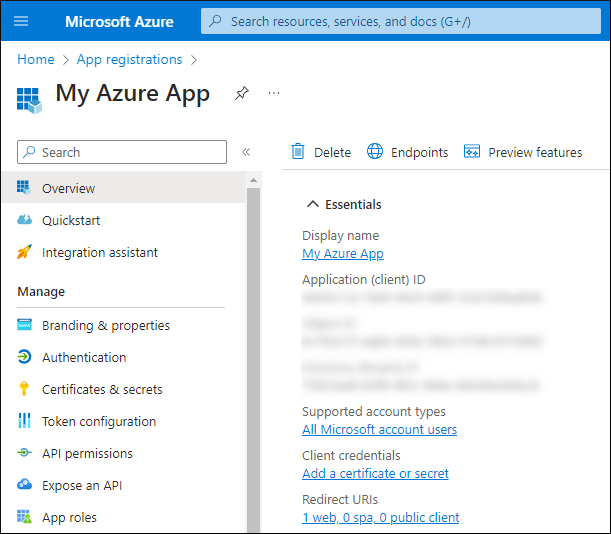
Your new app is now available under Home > App registrations.
Generating a client secret
-
Navigate to your new app (Home > App registrations > Your app name).
-
Under “Client credentials”, click Add a certificate or secret.
-
Click New client secret.

-
Enter a description and an expiry period, and then click Add.
Configuring the user consent screen
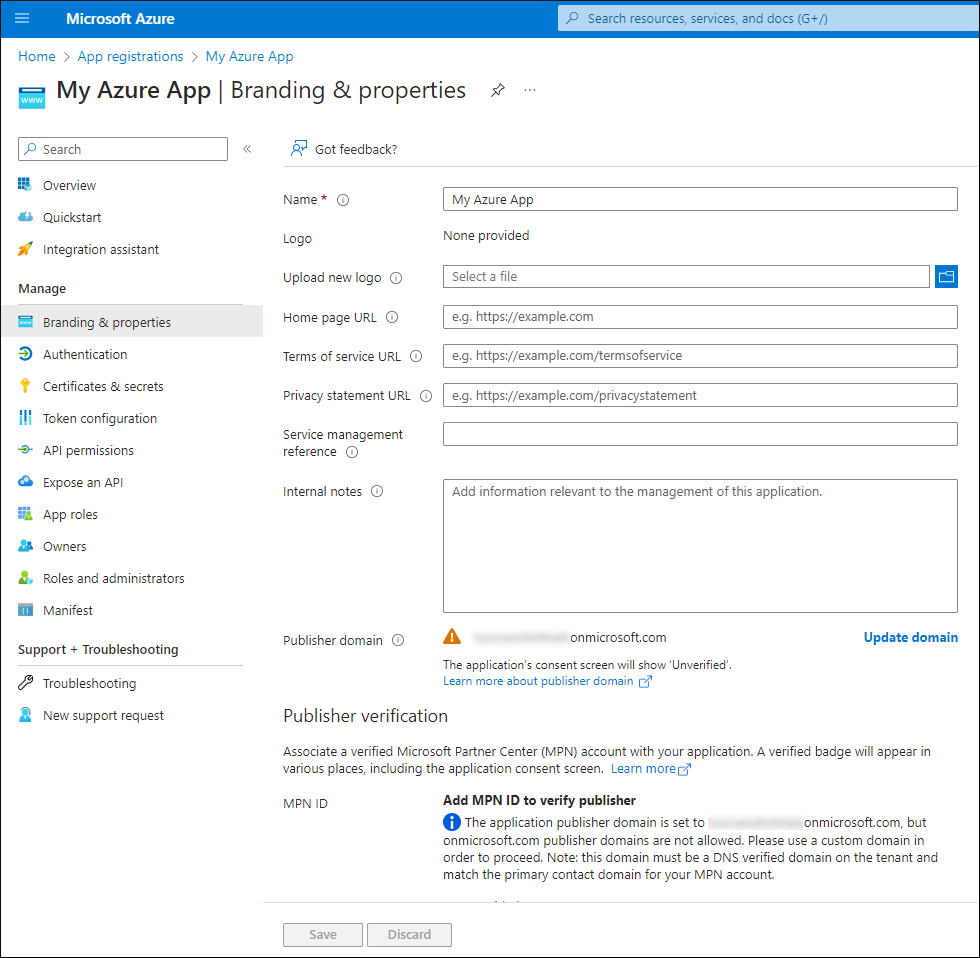
The consent screen is what your app’s users will see when they click the “Connect my Microsoft 365 account” (or a similar) button in your app. As an app publisher, you must verify your company or app’s domain as described in the on-screen instructions. Secondly, you are expected to provide a Microsoft Partner Network (MPN) ID, to ensure that your app’s end users will see a verified publisher on the consent screen.
-
Navigate to your new app (Home > App registrations > Your app name).
-
Click Branding & Properties.
-
Fill in the required fields as applicable. At the minimum, you should provide a publisher domain (that is, your company or app’s domain), and the Microsoft Partner Network (MPN) ID. Note that the latter is available only if your company takes part in the Microsoft Partner program. See https://partner.microsoft.com/ for more information.
Configuring API permissions
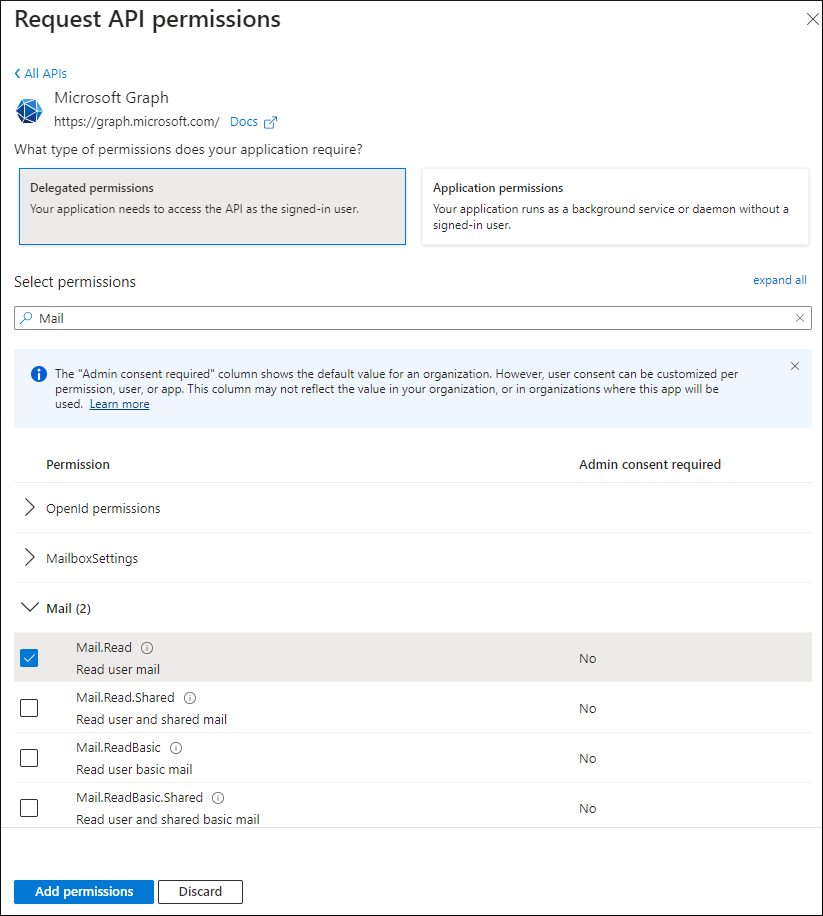
In order for your app to send and receive email on users behalf, certain Microsoft Graph permissions must be added to the app, as described below.
-
Navigate to your new app (Home > App registrations > Your app name).
-
Click API permissions.
-
Click Add a permission.
-
In the “Request API Permissions” area, search for and add the following permissions:
- email (View user’s email address)
- Mail.Read
- Mail.Send
- profile
- User.Read
- User.ReadAll
-
Click Add Permissions.