Configure an OAuth 2.0 client in Google
You can configure a Google OAuth 2.0 app and client from the Google Cloud Console (https://console.cloud.google.com/). Below you will find the most basic configuration steps required to set up a working application for testing purposes. Note that you likely need to perform extra configuration when you switch your application to production.
Create a project
-
Sign in to the Google Cloud Console at https://console.cloud.google.com/.
-
In the top application bar, click Select a project.
-
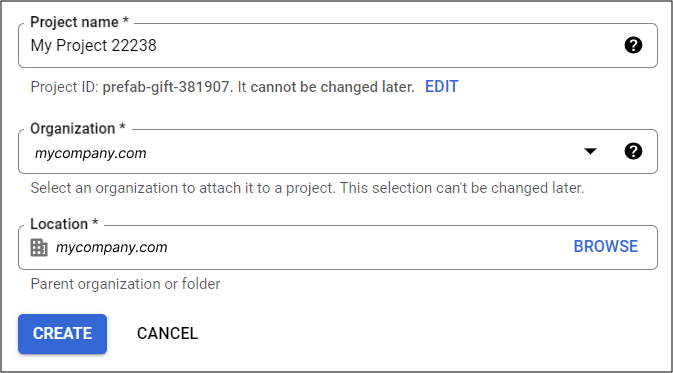
Click New project, enter your project information.
-
Click Create.
Create an OAuth 2.0 application
-
Select the project created previously.
-
Click the sandwich button in the top-left corner, and select APIs & Services > OAuth consent screen.
-
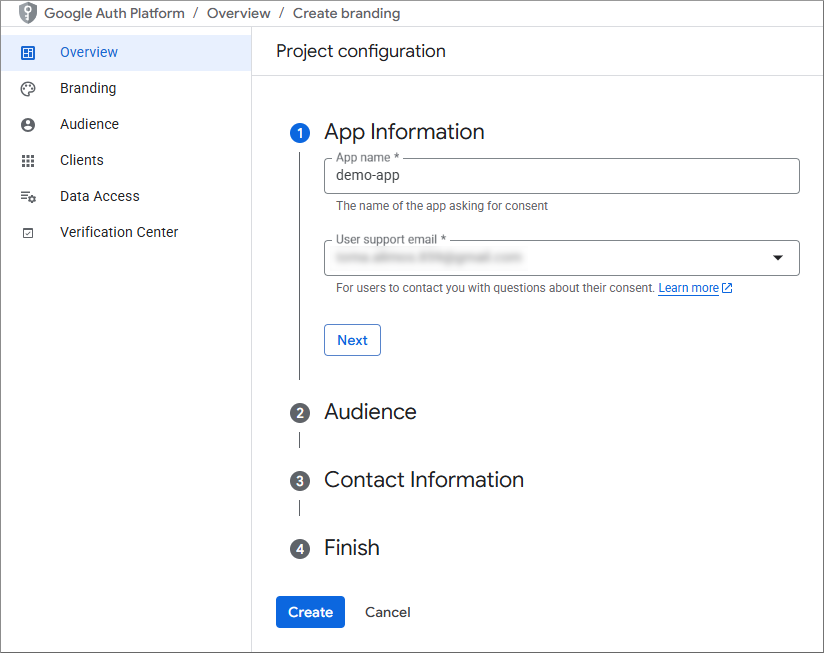
Click Get started.
-
Enter your app name, your support email, and click Next.
-
Under “Audience”, select External, and then click Next.
-
Under “Contact information”, enter your email address, and then click Next.
-
If you accept the license terms, select the relevant check box, and then click Create.
Create an OAuth 2.0 client
-
Click Create OAuth client.

-
Under “Application type”, select the kind of application you are developing, for example, Web application.
-
Enter a name for your OAuth 2.0 client.
-
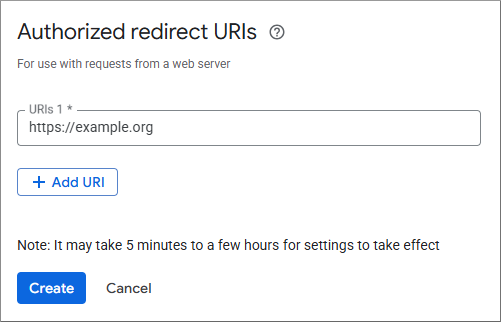
Under “Authorized redirect URIs”, enter the URI to which your application’s users should be redirected after they authenticated with Google, and click Add URI.
-
Click Create.
-
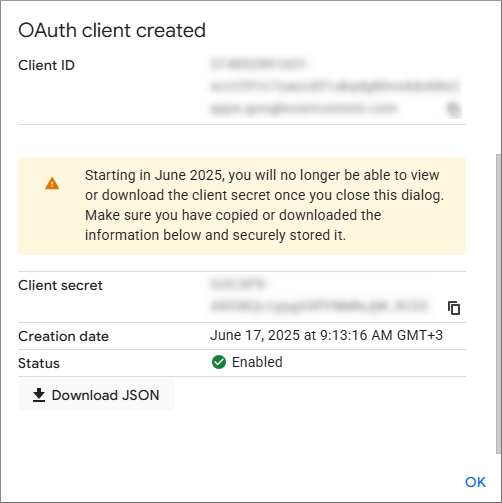
Click Download JSON to download your client secrets. You will need to enter this information in SBS later.
Add a test user
- From the left navigation menu, click Audience.
- Under “Test uses”, click Add users and enter your email address. Note that, while your app is in test mode, only test users can obtain OAuth 2.0 authorizations from Google.
Add scopes to your app
-
From the left navigation menu, click Data Access.
-
Click Add or remove scopes.
-
Select the following scopes and then click Update.
.../auth/userinfo.email
.../auth/userinfo.profile
-
Click Save.
Enable the Gmail API
-
Click the sandwich button, and select APIs & Services > Enabled APIs and services.
-
Click Enable APIs and services.
-
Search for the Gmail API and enable it.
