Document Rendering UI
From the Document Rendering page of the SBS portal, you can perform the following actions:
- Create, update, and delete document rendering templates.
- Create, update, and delete CSS definitions used for styling templates.
Access
You can access the Document Rendering page of the portal as follows:
- Sign in to the SBS Portal. During the sign-in process, you will be prompted to select the account, app, and tenant where you are entitled to sign in.
- Click Document Rendering in the left-hand side menu.
To interact with the Document Rendering service, you can use either the Web UI or a GraphQL interface. You can switch at any time between the two interfaces by clicking the switch displayed at the top of the page:

Templates
A template is a set of instructions for formatting email or text. Apart from formatting, a template provides the ability to dynamically render portions of text with the help of parameters. This is particularly handy when you do not want to hardcode the email text but rather replace certain strings in an email dynamically based on input data provided through parameters.
To understand how templates work, consider the following example: let’s suppose that your application needs to send an email with an activation code to several thousand application users. The email text should be the same for all users, except for the user name and the actual code. To enable sending such an email, you could create a template where the user name and code are parameterized, for example:
Dear {{username}},

This is your activation code:

{{code}}
When sending email through the Email Service, you can now reference the template above and supply the actual parameter values as JSON input to the email sending method. As a result, all parameters will be replaced with the values provided dynamically, and the final email text received by a particular user would look like:
Dear John Doe,

This is your activation code:

12345678
View templates
To view templates, click Document Rendering in the left-hand side menu.
By default, the Templates tab is selected. This tab displays all document rendering templates defined for the currently selected account, app, and tenant. Whenever you send an email through the Email Service, you can reference any of these templates in order to supply parameterized data to the email. For an example, see Sending email using a template.
Create a template
To create a template:
-
Click the Templates tab.
-
Click
 icon in the top-right corner of the grid. A template definition dialog box opens.
 -
Enter a template name.
The template name must not contain space characters. -
Select the template type. Use Email if the template will be used for sending email with the Email Service. Use Document for all other generic purposes (for example, rendering parameterized messages in your application).
The template type cannot be changed later. -
Select the template kind. HTML templates support HTML and CSS formatting code in the template body. Plain text templates render the text as is, without any formatting.
-
Enter the subject of the email in the Subject field (applicable only if you selected Email as template type). If you need to parameterize the subject, use double curly braces to designate parameter placeholders, for example:
Your activation on {{website}} -
Enter the template body in the Body field. If you need to parameterize the email body, use double curly braces to designate parameter placeholders, for example:
Dear {{username}}

This is your activation code:

{{code}}
If the template kind is HTML, the template body may contain HTML code, for example:
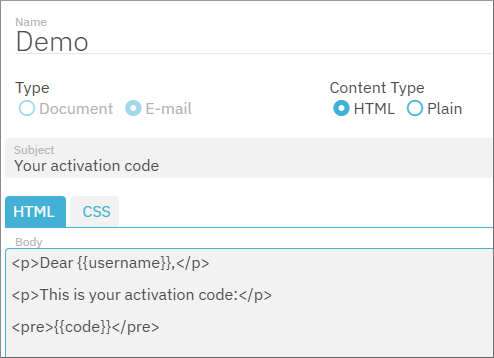
<p>Dear {{username}},</p>

<p>This is your activation code:</p>

<pre>{{code}}</pre>
For HTML templates, you can optionally add CSS formatting. To do this, click the CSS tab and enter your CSS code in the Custom CSS text box, for example:
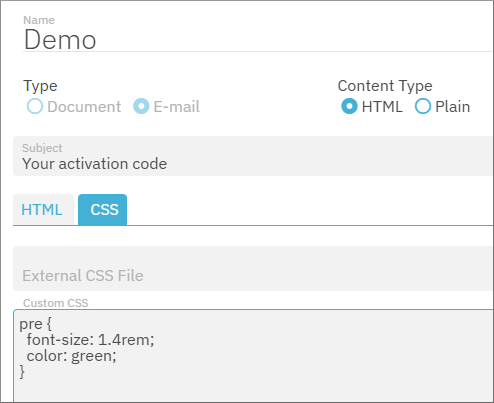
pre {
  font-size: 1.4rem;
  color: green;
}
If you have previously created any CSS definitions, they are available for selection in the External CSS File field.
When both local CSS rules and an external CSS file exist, the CSS rules precedence works in the same way as in HTML. Namely, if a CSS rule is found both at template level and in the external CSS, then the rule at template level takes precedence, since it is more specific. -
Click Save.
Preview a template
To preview a template:
-
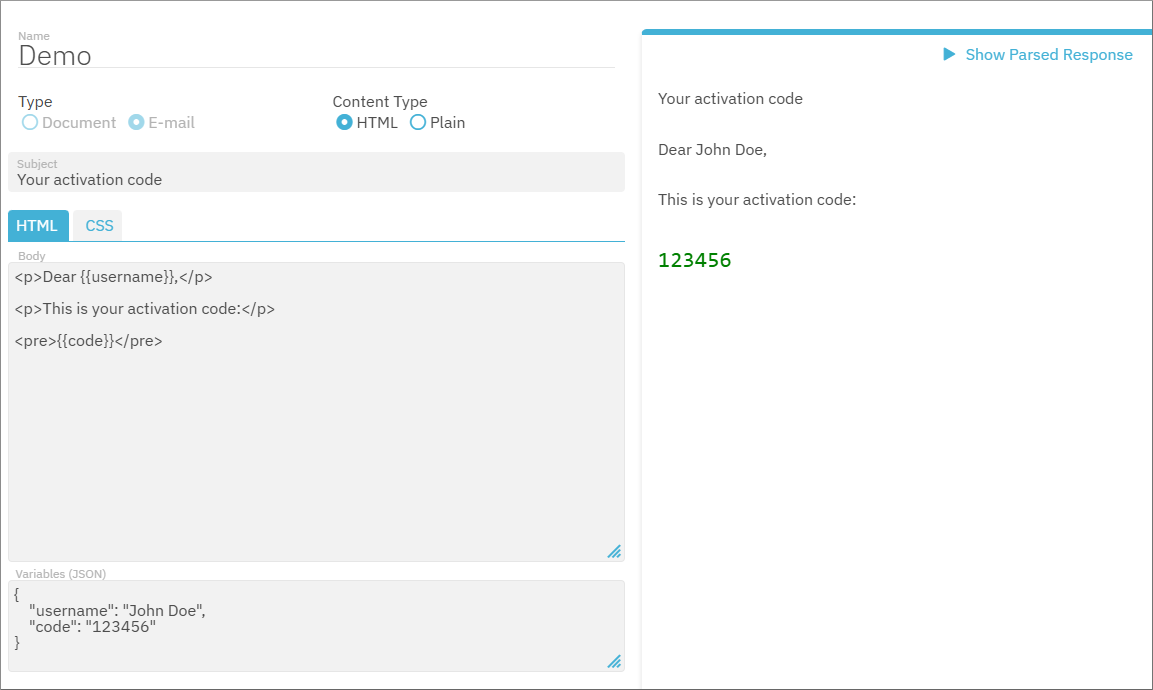
Enter the template parameters in the Variables (JSON) field. The parameters must be in JSON format, for example:
{ "username": "John Doe", "code": "123456" } -
Click Show Parsed Response.
Update a template
To open a template for update, either click the template ID (first column of the grid), or the  Edit button on the grid.
Delete a template
To delete a template, click the  Remove button on the grid.
CSS Definitions
A CSS definition is an object that stores a named set of CSS rules. You may reference CSS definitions from any template, and thus reuse them across multiple templates.
View CSS definitions
To view CSS definitions available for the current account, application and tenant:
- Click Document Rendering in the left-hand side menu.
- Click the CSS tab.
Create a CSS definition
To create a CSS definition:
-
In the CSS definitions grid, click
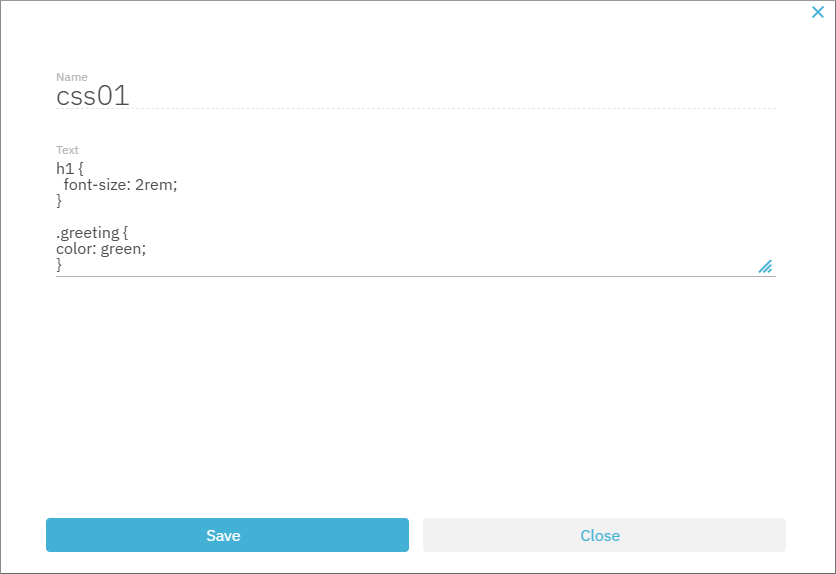
Add. -
Enter a definition name and your custom CSS rules.
-
Click Save.
Update a CSS definition
To update a CSS definition:
- In the CSS definitions grid, click Update next to the CSS definition that you want to update.
- Update the definition name and the CSS rules as required.
- Click Save.
Delete a CSS definition
To delete a CSS definition:
- In the CSS definitions grid, click Delete next to the CSS definition that you want to delete.
- Confirm your action when prompted.